This Help topic describes the steps for implementing guest registration using Salesforce as a way to obtain end user information.
In this scenario, the Guest Registration portal provides the option to register as a guest or log into Salesforce in order to complete the registration process. If the end user selects the Salesforce option, ExtremeCloud IQ Site Engine uses OpenID to securely access the end user's Salesforce account, obtain public end user data, and use that data to complete the registration process.
| NOTE: | Guest OAuth (for example, Google, Yahoo) may not support native mobile browsers and display a “user agent” error. To access the network, use a standard browser application (e.g. Google Chrome). |
Guest Registration using Salesforce has two main advantages:
- It provides ExtremeCloud IQ Site Engine with a higher level of user information by obtaining information from the end user's Salesforce account instead of relying on information entered by the end-user.
- It provides an easier registration process for the end user. ExtremeCloud IQ Site Engine retrieves the public information from the end user's Salesforce account and uses that information to populate the name and email registration fields.
This topic includes information and instructions on:
- Requirements for Salesforce Registration
- Creating a Salesforce Application
- Portal Configuration for Salesforce
- How Salesforce Registration Works
- Special Deployment Considerations
Requirements
These are the configuration requirements for Salesforce Registration.
- The ExtremeControl engine must have Internet access in order to retrieve user information from Salesforce.
- The ExtremeControl Unregistered access policy must provide access to the Salesforce site (either enable all SSL or make allowances for Salesforce servers).
- The ExtremeControl Unregistered access policy must provide access to HTTPS traffic to the Salesforce OpenID servers.
- A Unique Salesforce application must be created on the Salesforce Developers page (see instructions below).
- The Portal Configuration must have Salesforce Registration enabled and include the Salesforce Application ID and Secret (see instructions below).
Creating a Salesforce Application
When implementing guest registration using Salesforce, you must first create a Salesforce application. This generates an Application ID and Application Secret that are required as part of the ExtremeCloud IQ Site Engine OpenID process. Use the following steps to create a Salesforce application.
- Access the Salesforce Developers page at https://developer.salesforce.com/signup.
- Log into your existing Developers account or create a new Developers account.
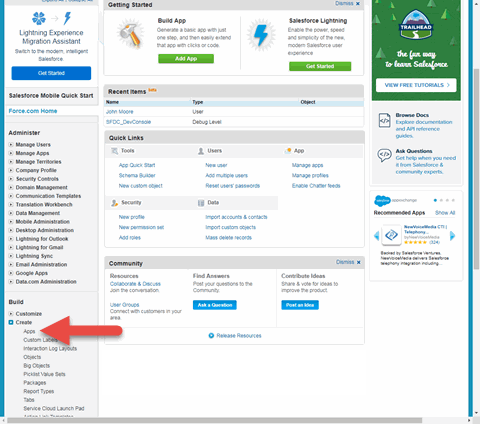
- Select the My Developer Account button from the profile drop-down list.
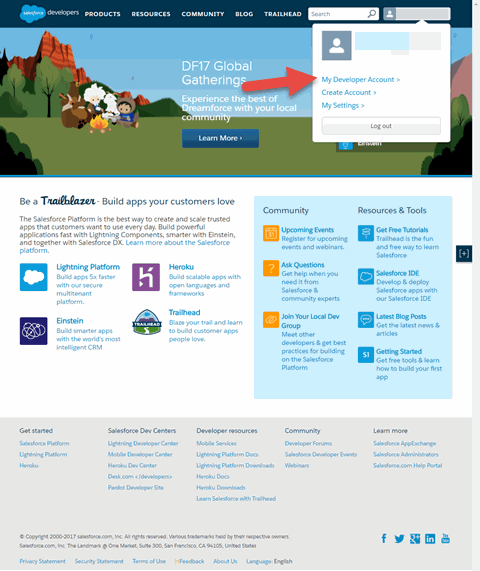
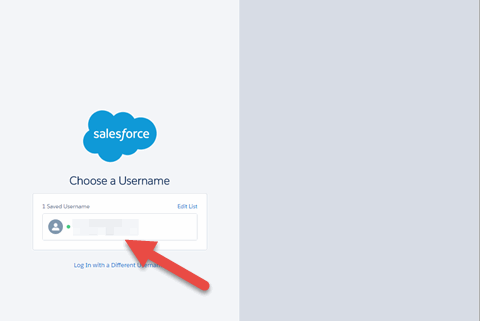
The Developer Account login window opens. - Select your account.
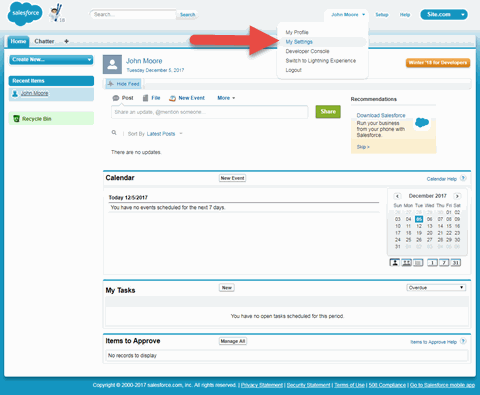
The Developer Home window opens. - Select My Settings from the Profile drop-down list.
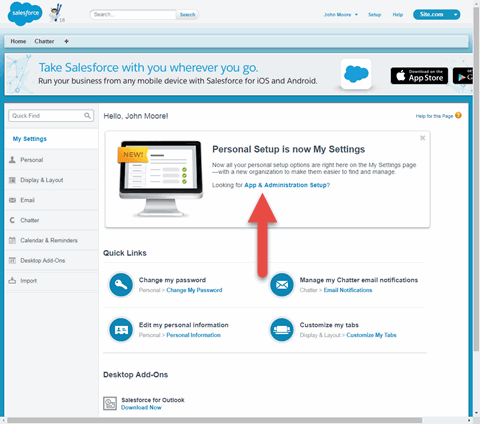
The My Settings window opens. - Select App & Administration Setup.
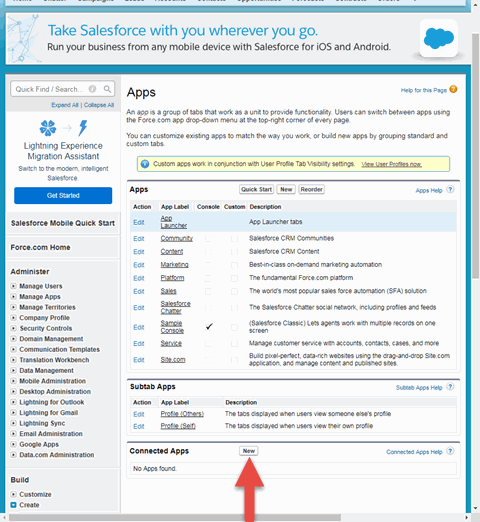
The App & Administration Setup window opens. - Select Apps from within the Build > Create menu.
The Apps window opens. - Select the New button in the Connected Apps section.
The New Connected App window opens. - Enter a Connected App Name, API Name, Contact Email, and select the Enable OAuth Settings checkbox.
The API (Enable OAuth Settings) section of the window expands to display additional fields. - Select Enable OAuth Settings.
- Enter a Callback URL in the following format
https://<AccessControlengineFQDN>/Salesforce_oauth. Salesforce uses the Authorized redirect URI to redirect the user back to the engine with an Access Token. - Select Access your basic information (id, profile, email, address, phone), Full access (full), and Allow access to your unique identifier (openid), then select the Add icon in the Selected OAuth Scopes section of the window to add the scopes to the Selected OAuth Scopes list.
- Select the Require Secret for Web Server Flow, Include ID Token and Include Standard Claims checkboxes.
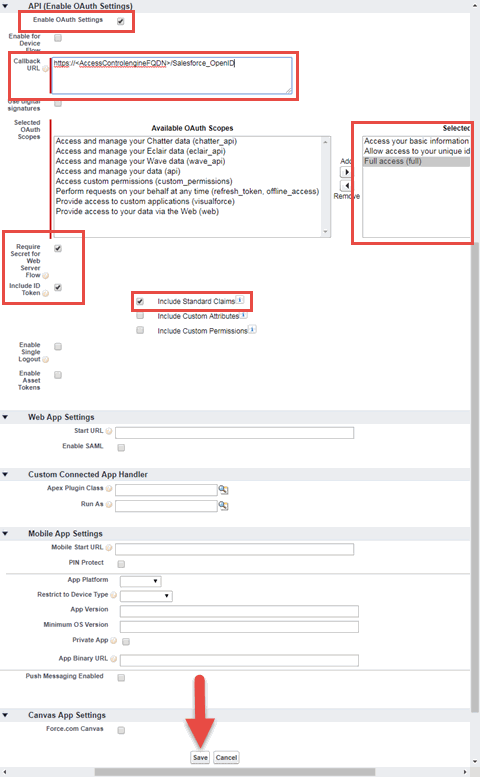
- Select Save.
Your application is created and ready to use.
The New Connected App window opens.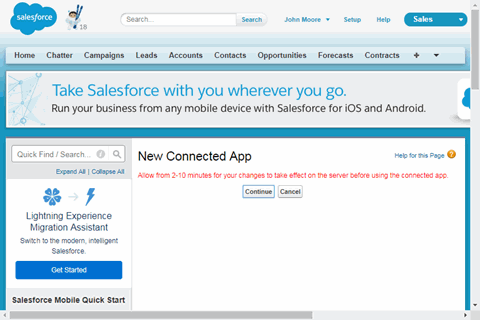
- Select Continue.
The Connected App window opens. - Select the Click to reveal link in the Consumer Secret field and copy the Consumer Secret and Consumer Key.
s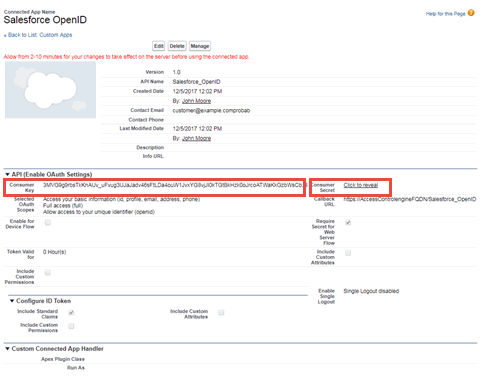
You need to add the Consumer Key and Consumer Secret to your portal configuration.
| NOTES: | Salesforce OpenID APIs require your engine's FQDN resolves to a top level domain (.com, .net, .edu, .org, .mil, .gov, or .int. You cannot use a domain not classified as top level (e.g. MyGateway.MyCompany.Local) or the engines IP address, which can require you to reclassify your domain and hosts. Use only lowercase when entering the host and domain suffix (e.g. .com). |
|---|
Portal Configuration
The client ID and client secret assigned during the creation of the Salesforce application must be provided in the Portal Configuration in order for the entire process to complete properly.
- Open the Control > Access Control tab.
- In the left-panel tree, expand the ExtremeControl Configurations > Portal tree and select Guest Registration.
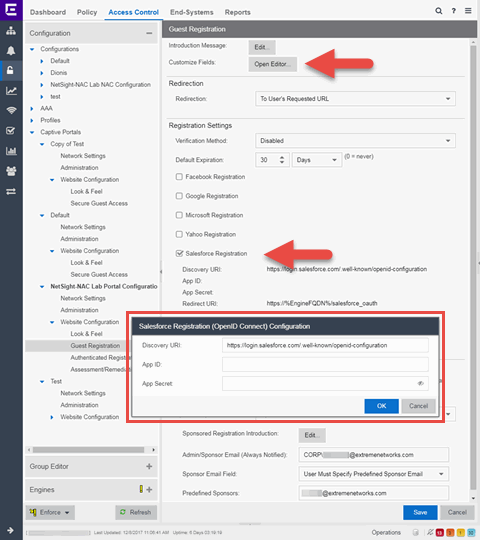
- In the Customize Fields section, select the Open Editor button to open the Manage Custom Fields window where you can change registration portal fields. Salesforce registration uses only the First Name, Last Name, and Email Address fields, and the Display Acceptable Use Policy (AUP) option. All other fields only apply to regular guest registration. If the Display AUP option is selected, the captive portal verifies that the AUP has been acknowledged before redirecting the user to Salesforce.
- Select the Salesforce Registration checkbox.
- Enter the Consumer Key in the App ID field and the Consumer Secret in the App Secret field.
- Select Save. Warning messages display stating that Verification Method and Sponsorship are not used for Salesforce registration, and that an FDQN is required will be enabled.
- Enforce the new configuration to your engines.
How Salesforce Registration Works
After you have configured Salesforce registration using the steps above, this is how the registration process works:
- The end user attempts to access an external Web site. Their HTTP traffic is redirected to the captive portal.
- In the Guest Registration Portal, the end user selects the option to register using Salesforce.
- The end user is redirected to the Salesforce login. If Acceptable Use Policy option is configured, the captive portal verifies that the AUP has been acknowledged before redirecting the user to Salesforce.
- When logged in, the end user is presented with the information that ExtremeCloud IQ Site Engine receives from Salesforce.
- The end user grants ExtremeCloud IQ Site Engine access to the Salesforce information and is redirected back to the captive portal where they see a "Registration in Progress" message.
- Salesforce provides the requested information to ExtremeCloud IQ Site Engine, which uses it to populate the user registration fields.
- The registration process completes and network access is granted.
- The word "Salesforce" is added to the user name so you can easily search for Salesforce registration via the Registration Administration web page.
Special Deployment Considerations
Read the following deployment consideration prior to configuring Salesforce Registration.
To provide access to your network via a wireless connection, create an L7 host record for the Unregistered Role on your Wireless Controller for login.Salesforce.com. This domain is subject to change and can vary based on location.
Networks using DNS Proxy
Salesforce Registration for networks redirecting HTTP traffic to the captive portal using DNS Proxy requires additional configuration.
In order for Salesforce Registration to work properly with DNS Proxy, all domains/URLs necessary to properly load the Salesforce web page must be added to the Allowed URLs/Allowed Domains section of the captive portal configuration. Otherwise, the ExtremeControl engine resolves DNS queries for these components to the ExtremeControl engine IP causing the page to not load properly.
As of February 2017, you must add the following domains in order for Salesforce registration to work with DNS Proxy. This domain is subject to change and can vary based on location.
login.Salesforce.com
For information on related help topics: