You can create a custom Saint scan for networks that use on-board agent-less assessment.
The custom scan feature is useful if you are already using Saint assessment and want to integrate existing custom scans into ExtremeControl. It also allows you to create a custom scan with assessment criteria that requires only a limited number of port scans and tests.
To create a custom scan, you must connect to the Saint web service and use the Saint web interface to configure the scan. After you have created the scan, you will be able to add it to your agent-less test set configuration and use it for your end-system assessment.
Use the following steps to create a custom scan:
- Connect a monitor and keyboard to your ExtremeControl engine, or connect via SSH.
- From the CLI, "cd" to the directory /opt/nac/saint/saint.
NOTE: On some ExtremeControl engines, the second Saint directory includes a version number. For example, /opt/nac/saint/saint-8.5.11. - Start the Saint web service by entering the following command line argument:
./custom_policy_editor.pl -r -h <ip>where<ip>is the IP address of the system that is going to connect to the Saint web service and configure the custom scan (for example, your laptop system).NOTE: You cannot run custom_policy_editor.plfrom any directory. You must "cd" to the directory/opt/nac/saint/saint. - During the web service start-up, you are asked to create login user names and passwords for two accounts: saint and admin. The accounts are disabled by default, but they become enabled when you provide a password for them. After you complete the start-up by providing the user names and passwords, you are ready to connect to the web service and configure your custom scan.
- From the connecting system, connect to the Saint web service by entering the following URL in a web browser window:
http://ip of Extreme Access Control engine>:1414 - Login using the admin user name and password that you created during the web service startup. (The Welcome screen automatically displays the Saint username and password; you need to change it to the admin username and password.)
- Select the Create option in the Custom Scan Level Selection screen after you have logged in.
- Create a new scan by entering a name, choosing a template, and selecting the Add button.
- Configure your custom scan by selecting the Vulnerability Checks, Port Scans, and other desired options in the Custom Scan Setup screen. Select Save at the bottom of the web page to save your scan. (You might need to scroll down to see this button).
- The custom scan is created. Close your web browser window.
- Enter the name of the scan in your agent-less test set in ExtremeControl:
- From the Extreme Access Control engine command line, cd to the
/opt/nac/saint/saint/config/policydirectory to determine the name of the scan.NOTE: On some ExtremeControl engines, the second Saint directory will include a version number. For example, /opt/nac/saint/saint-8.5.11/config/policy. - In the policy directory, there are two files that contain the name of the scan as you entered it in the Saint web interface. For example, if you named the scan "MyCustom," you'll see the following two files in the directory:
saint_data_MyCustom.probe
andsaint_data_MyCustom.conf.
In this example, the scan name that you enter into ExtremeControl is saint_data_MyCustom. You can rename the scan if desired, as long as you rename both the .probe and .conf files. If you rename the scan, enter the new name into ExtremeControl. - Select ExtremeControl Configurations > ExtremeControl Profiles > Assessment in the left-hand menu to open the Manage Assessment Settings window.
- In the Assessment Configurations tab, select any configuration and select Edit. The Edit Assessment Configuration window opens. You can also select Add to
add a new assessment configuration, and then open the Edit Assessment Configuration
window.
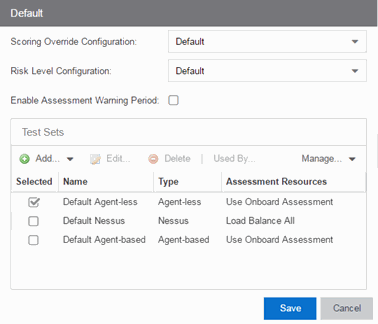
- The Test Sets section of the window includes a list of all the test sets available for your assessment configurations. Select the agent-less test set that will be configured to use the custom scan, select the test set you want to configure, and select Edit. (Select Add Agent-less if you need to create a new test set.)
- In the Scanning Level section of the Edit Agent-less Test Set window, select Custom from the drop-down list and enter the scan name as determined in step b. Select OK.
- The agent-less test set with the custom scan can now be used in your assessment configurations.
- From the Extreme Access Control engine command line, cd to the
For information on related help topics: