Adding Disk Space to a Virtual Engine
The topic describes how to increase the amount of drive space on a VMware virtual machine or on a Hyper-V virtual machine allocated to the ExtremeCloud IQ Site Engine 64-bit virtual engine without having to interrupt engine service on the network.
The virtual engine contains a preconfigured hard drive where the operating system and engine software is installed. The size of the hard drive takes into account two important factors: that hard drive space is often a premium resource and that insufficient drive space can prevent the software from running correctly.
With proper file management, the preconfigured disk space should be sufficient for most networks. However, in some scenarios, the disk space amount is not sufficient and new disk space needs to be added.
The ExtremeCloud IQ Site Engine virtual engine is configured to use Logical Volume Management (LVM). This allows multiple drives to be presented to the operating system as a single contiguous drive. It also provides a mechanism for dynamically adding additional volumes to the main volume group.
The process described in this topic includes adding a new virtual hard drive to the virtual engine, and then running commands to include the new drive in the logical volume group and expand the file-system to format the additional disk space.
| NOTES: | Prior to adding a new drive to the virtual engine, it is recommended that you run the following command on the engine command line and make note of the existing drives:ls -la /dev/sd*Once the additional drive space is added, re-running this command helps to identify the drive name is added. It is also recommended that you take a snapshot of the VM before adding a new drive. That way, if anything goes wrong, you can easily revert back to the original VM without needing to reinstall ExtremeCloud IQ Site Engine. Refer to the vSphere client documentation or Hyper-V documentation for instructions on creating a snapshot. |
Adding a Virtual Drive on a VMware Virtual Machine
The steps to add a virtual drive on a VMware virtual machine are performed in the VMware vSphere client with the target virtual machine (VM) selected. You do not need to shut down the virtual machine or any of its processes to perform the steps.
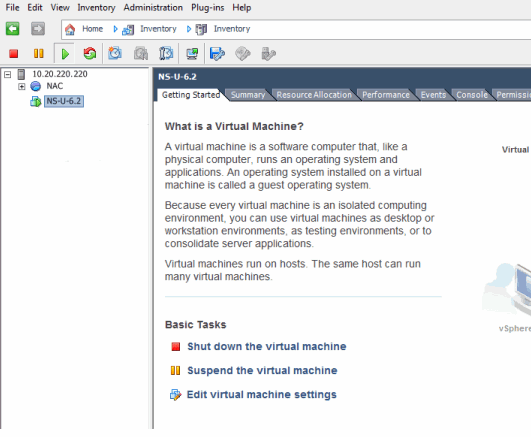
- In the vSphere client, select the target VM. On the Getting Started tab, select Edit virtual machine settings.
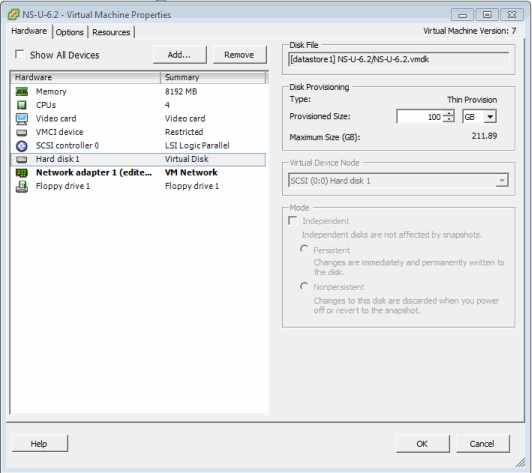
- On the Hardware tab, verify that there is a single virtual hard disk configured for the VM. Select the Add button.
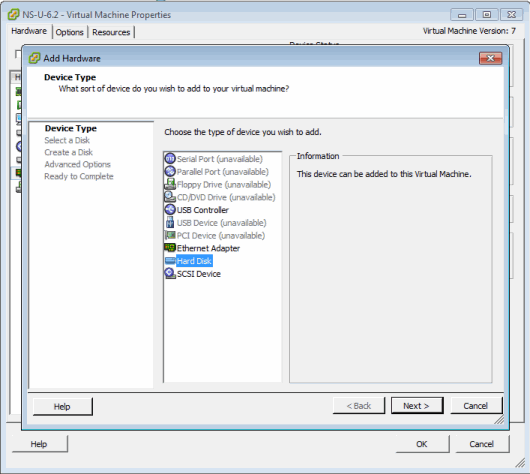
- In the Add Hardware window, select Hard Disk to add a new hard disk, and then select Next.
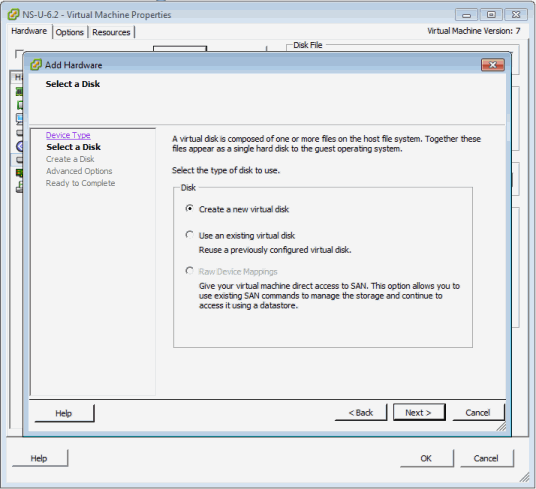
- Select the Create a new virtual disk option and select Next.
- Enter the desired size of the new disk. Select the Thick Provision Lazy Zeroed option and select Next.
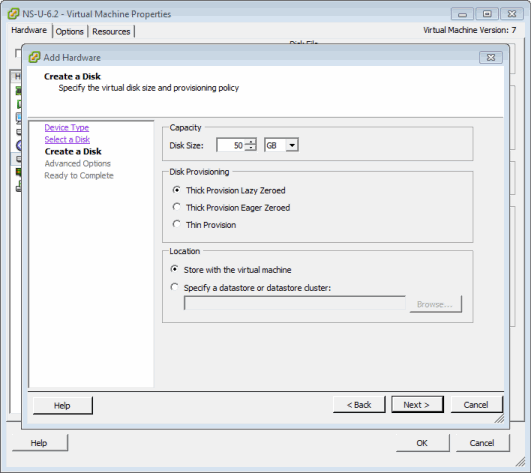
- Leave the default Virtual Device Node value of SCSI (0:1) and select Next.
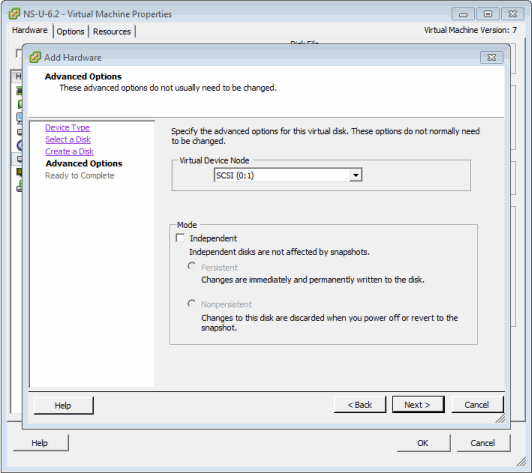
- Review the summary of selected options and select Finish.
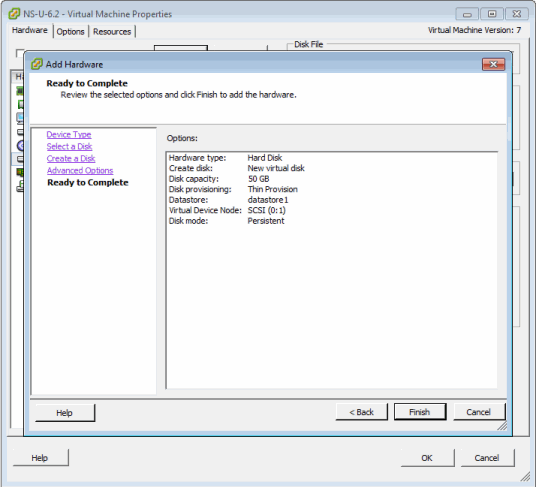
- The Hardware tab shows the new hard disk that was added. Select OK to save the change.
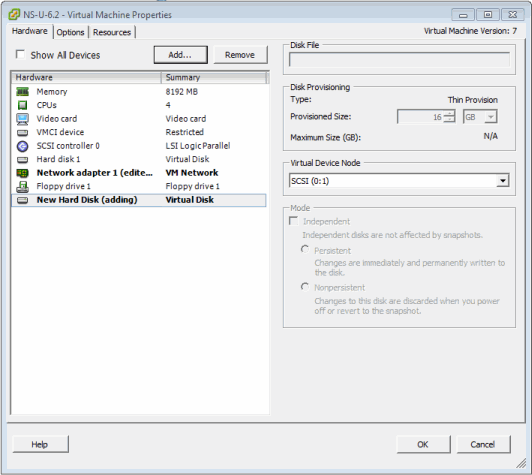
Repeating these steps to add additional drives results in different labels for those drives. For example, the label on the first drive you add is /dev/sdb, while the next drive added is labeled /dev/sdc.
In order to make the additional space available to the operating system, follow the instructions in the "Accessing the New Drive" section.
Adding a Virtual Drive to a Hyper-V Virtual Machine
The steps to add a virtual drive on a Hyper-V virtual machine are performed in the Hyper-V Manager application with the target virtual machine (VM) selected. You need to shut down the virtual machine to perform the steps.
- Open Hyper-V Manager.
- Select the target VM.
- Shutdown the VM.
- Select the Settings... link in the Actions pane.
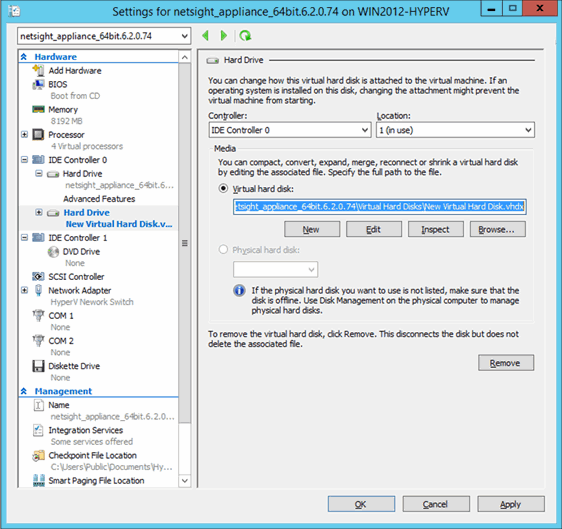
The Settings window opens for the VM.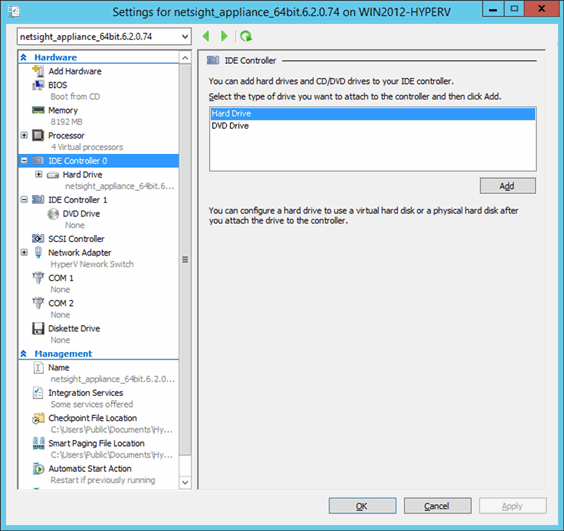
- Select IDE Controller 0 in the Hardware left-panel, Hard Drive in the IDE Controller area, and then select the Add button.
- Select the new hard drive in the Hardware left-panel, if necessary.
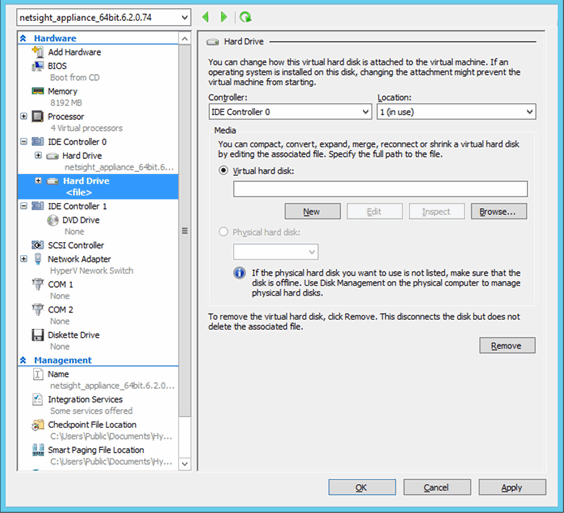
- Select the New button under the Virtual hard disk field to add a new virtual hard disk.
- Select Next.
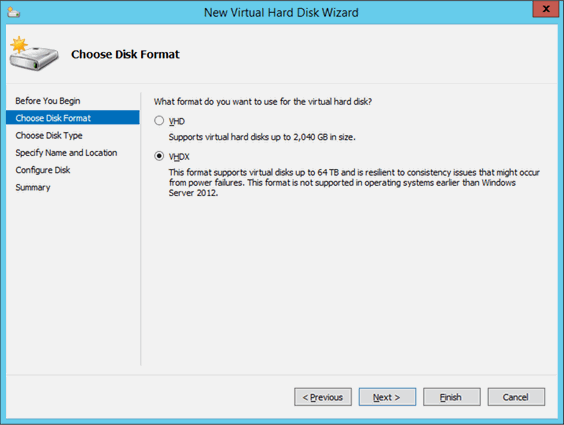
- Select VHDX and select Next.
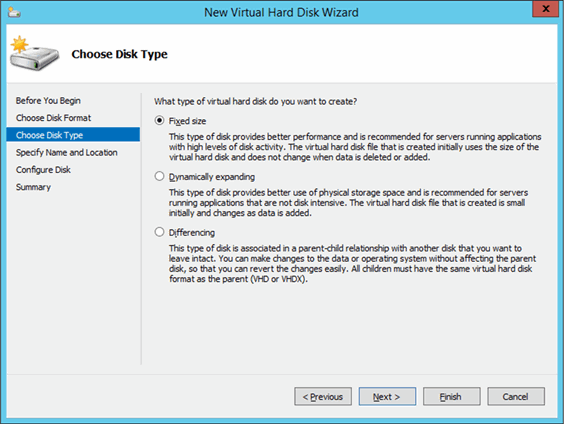
- Select the appropriate disk type depending on your configuration and select Next.
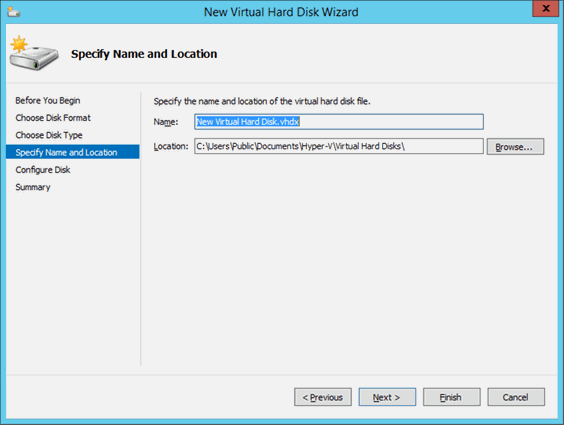
- Enter a Name and a Location for the virtual hard disk and select Next.
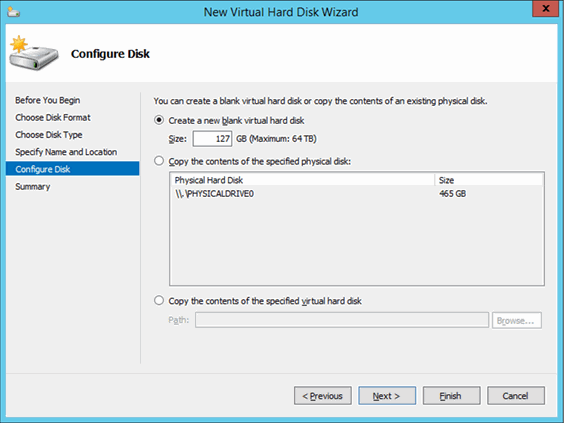
- Select Create a new blank virtual hard disk, enter the Size of the new virtual hard disk in gigabytes, and select Next.
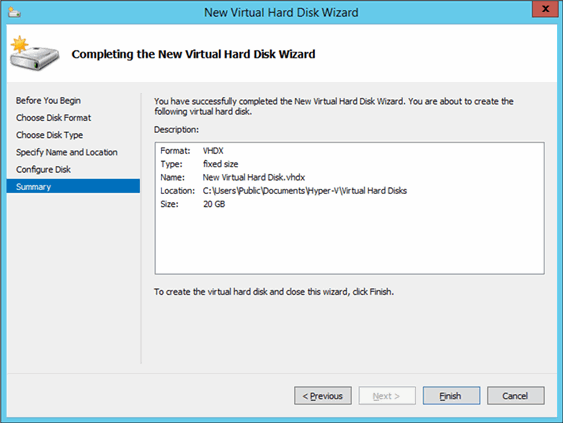
- Verify the information in the Description field is accurate and select Finish to create the new virtual hard disk.
- Select OK to save the changes to the virtual machine.
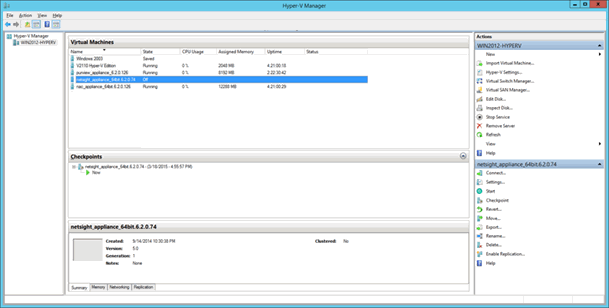
A new hard drive appears in the Hardware left-panel within the IDE Controller 0 navigation tree.
The New Virtual Hard Disk Wizard opens to the Before you Begin window.
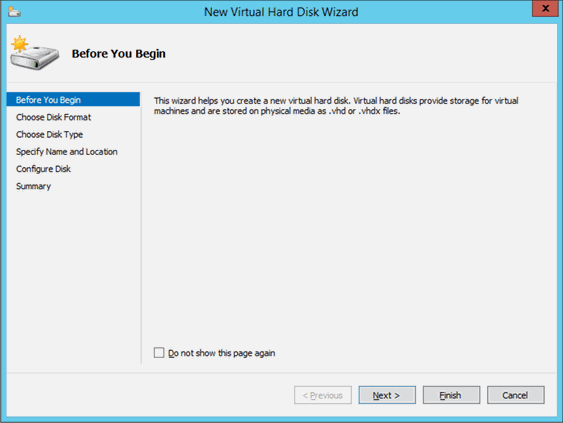
The Choose Disk Format window opens.
The Choose Disk Type window opens.
The Specify Name and Location window opens.
The Configure Disk window opens.
The Completing the New Virtual Hard Disk Wizard window opens.
The Settings window opens for the VM.
Accessing the New Drive
After you add the new hard drive, you must run the following script in order to allow the engine to access the additional space. The script must be run by the root user.
- Enter the following in the engine command line prompt:
- Type
cd ~root/scriptsand press Enter to open the scripts directory. - Type
./expandLVM.shand press Enter to run the script.
- Type
- Type y and press Enter when the following confirmation message is displayed:
WARNING:
This script attempts to locate a new virtual drive and add it to the current LVM configuration. This script formats the new drive; use only in accordance with official instructions to increase the size of the hard drive.
Would you like to proceed? [n]:
The script runs, allowing the engine to access the new drive.
Reinstalling the Engine Software from an ISO image
If it becomes necessary to reinstall engine software onto the virtual engine, all hard disks except the first hard disk must be removed from the VM before the VM is booted from the new image. Failure to do this may cause the install to fail.
Following the reinstall, take a new snapshot of the VM after it is reconfigured with the appropriate disk space. If you revert to a snapshot prior to the reinstall, the VM hard drive returns to its original preconfigured size. Refer to the vSphere client documentation or Hyper-V documentation for instructions on creating a snapshot.