This Help topic describes how to configure and use the ExtremeControl pre-registration feature as a part of Secure Guest Access or Authenticated Registration. With pre-registration, guest users can be registered in advance and given a username and password, allowing for a more streamlined and simple registration process when the guest user connects to the network. This can be particularly useful in scenarios where guest users are attending a company presentation, sales seminar, or a training session.
Pre-registration allows IT to delegate control of the network registration process to less technical personnel such as company receptionists, administrative assistants, or training personnel. Using the pre-registration web portal, selected personnel can easily register guest users in advance of an event, and print out a registration voucher that provides the guest user with their appropriate registration credentials. The guest user then follows the instructions on the voucher to connect to the corporate network.
This topic includes information and instructions on:
Configuring Pre-Registration
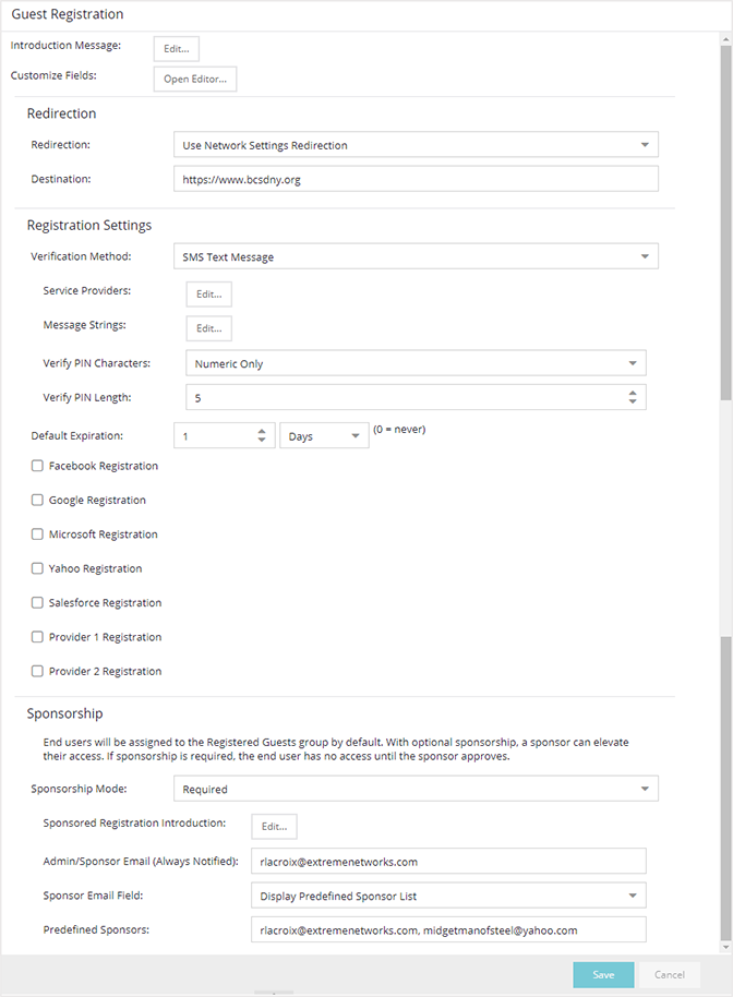
Following are instructions for configuring pre-registration in your portal configuration.
- Open the Control > Access Control tab.
- Select Portal Configurations > Website Configuration in the left-panel navigation tree.
- Select Guest Access or Authenticated Registration (depending on the access type you are configuring).
NOTE: If neither panel is available in the Website Configuration navigation tree, select Website Configuration in the left-panel and select the appropriate configuration. - Select the Enable Pre-Registration Portal checkbox and specify whether personnel are able to register a single user, multiple users, or both single and multiple users.
- Set the Generate Password Characters and Generate Password Length options. ExtremeControl uses these options when generating passwords for guest users to use when connecting to the network. These settings are shared by Authenticated Registration and Secure Guest Access. Changing it for one access type also changes it for the other.
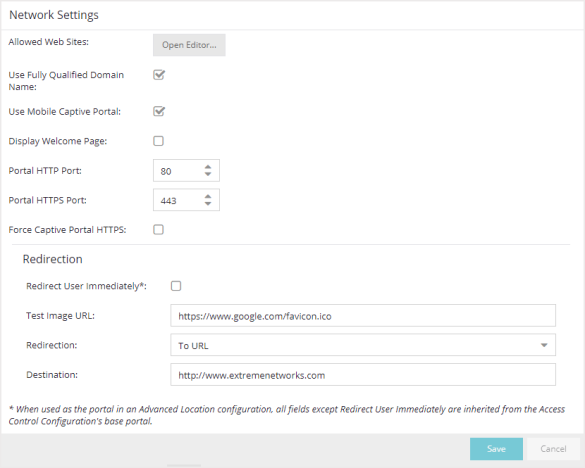
- For Authenticated Registration, select the Network Settings view to configure the connection URL specified on the Guest User Voucher (for example, www.ExtremeNetworks.com). Enter the URL in the Redirection To URL field.
For Secure Guest Access, the Guest User Voucher provides instructions for connecting directly to the secure SSID.
- Select Save to save your changes. Enforce your ExtremeControl Configuration to your engines.
- Access the Pre-Registration Portal by entering the following URL in
a browser window:
https://<ExtremeControlEngineIP>/pre_registration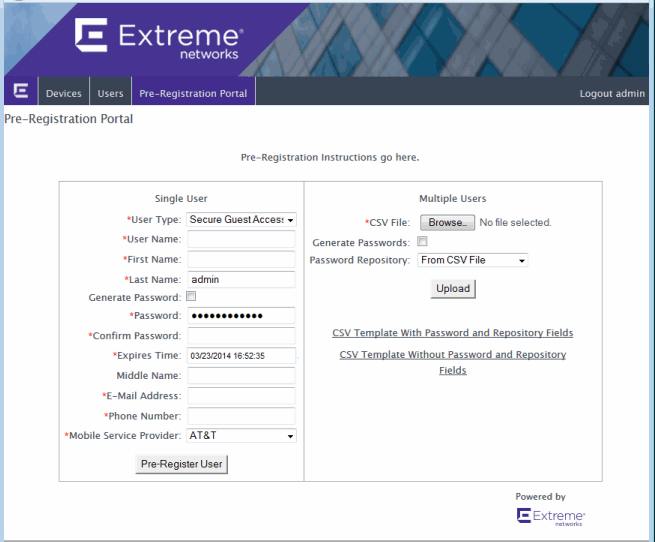
- At the top of the portal web page are instructions for the people performing the pre-registrations. To
modify and edit these instructions:
- In the Control > Access Control tab, select I&A Configurations > Portal in the left-panel navigation tree.
- Select a Portal Configuration and select Website Configuration > Look & Feel to open the Look & Feel panel.
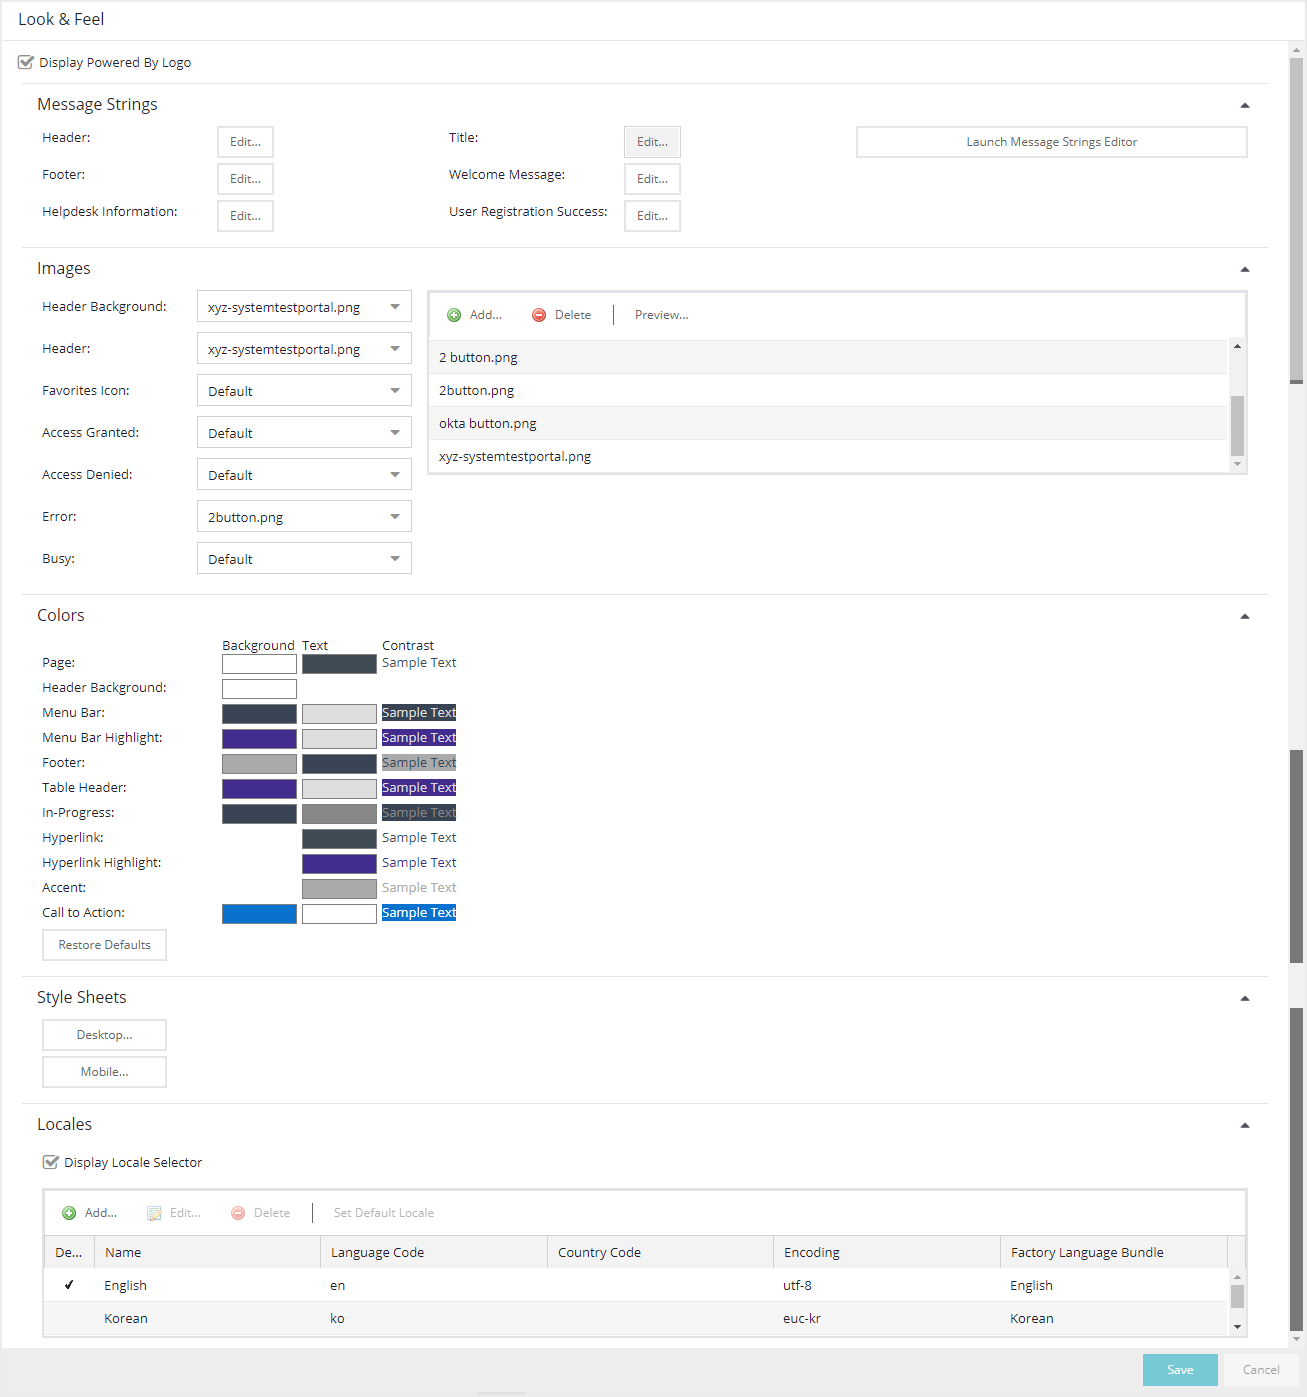
- Select the Message Strings Launch Message Strings Editor button. The Message Strings Editor window opens.
- Scroll down to the "preregIntroMulti" or "preregIntroSingle" message key and double-click that line. The Modify Localized Entry window
opens.
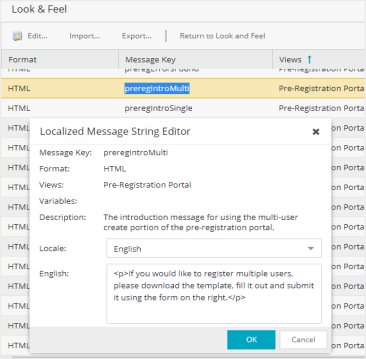
- Enter any changes or modifications you wish to make to the instructions, and select OK to close the window.
- Enforce the changes to your engines.
- Refresh the browser window to see the new instructions in the Pre-Registration Portal.
- The following sections provides information on how to pre-register a single user (when you want to pre-register one user at time) or multiple users (when you have a larger group of users to pre-register).
Pre-Registering Guest Users
After you have configured pre-registration, provide the URL for the Pre-Registration Portal (https://<ExtremeControlEngineIP>/pre_registration) to the personnel who are pre-registering guests. This can be network administrators or it can be personnel such as company receptionists, administrative assistants, or training personnel. (These users must be configured with administrative login privileges to access the web page).
The following sections provide steps for pre-registering single or multiple users in the Pre-Registration Portal.
Pre-Registering a Single User
Use the instructions in this section to pre-register a single end user using the
Single User panel in the Pre-Registration Portal.
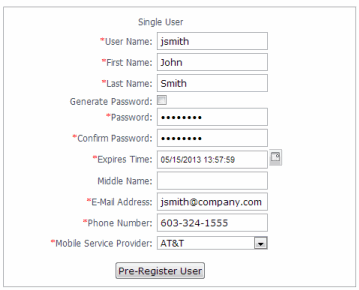
- Enter the information for the guest user you want to pre-register. Fields
with a red asterisk are required.
- User Name — Enter the user name for the guest user when connecting to the network. Usernames must be unique and cannot already exist in the local password repository. Usernames are case sensitive. For example, "JSmith" and "jsmith" would be considered two different usernames.
- First Name/Last Name — Enter the guest user's first and last name. The name is printed on the voucher along with their registration credentials.
- Password/Confirm Password — Enter and confirm the password for the guest user connecting to the network. Select the Generate Password checkbox if you want ExtremeCloud IQ Site Engine to automatically generate a password for you.
- Password Repository — When you pre-register the user, their credentials are automatically added to the local password repository specified here. Local Password Repositories are configured in the AAA Configuration window. (You only see this field if you have multiple repositories.)
- Expires Time — Select a registration expiration date from the calendar. The time is automatically set to 0:00:00, which is midnight. You can enter a specific time, if desired.
NOTE: You can add additional fields to be displayed here using the Manage Custom Fields window accessed from the Customize Fields link in the Edit Portal Configuration window's Authenticated Registration view or Secure Guest Access view. However the Pre-Registration web page always displays the First Name and Last Name fields even if they are not selected as visible/required in the Manage Custom Fields window. This is because it is important for the first and last name to be included on the pre-registration voucher printed out. - Select the Pre-Register User button to register the user. The user is added to the local password repository and added to the Registration Administration web page.
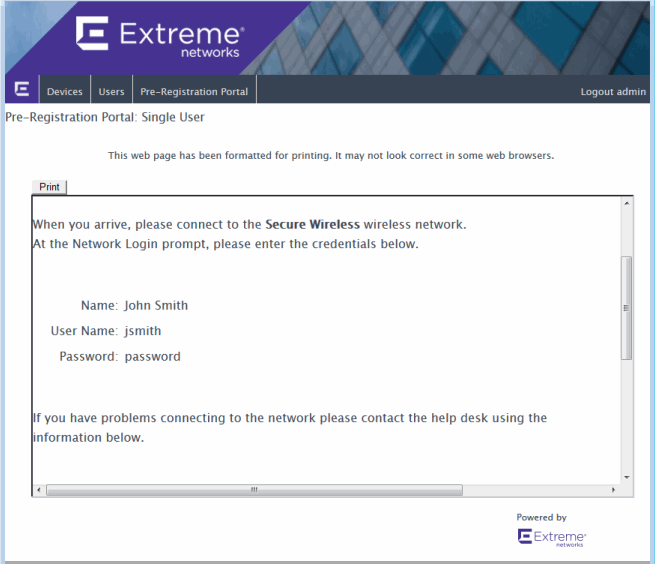
- A voucher (see example below) is generated that provides registration instructions and the guest user's registration credentials. Print out this voucher to give to the guest user.
| IMPORTANT: | The voucher must be printed out immediately, as there is no way to go back and print out a voucher after you leave the web page. If you do not print out the voucher, the voucher needs to be created by hand. In the event that the "Generate Password" option was used, you need to modify the guest user password using the registration administration page or local repository administration. |
- To register another user, you must re-access the Pre-Registration page by using the browser's back button or re-entering the URL.
Pre-Registering Multiple Users
Use the instructions in this section to pre-register multiple end users at one
time using the
Multiple Users panel in the Pre-Registration Portal. When pre-registering
multiple users, create a CSV file to provide all the user credential
information in table form. Then, upload the file to ExtremeCloud IQ Site Engine to
perform the pre-registration.
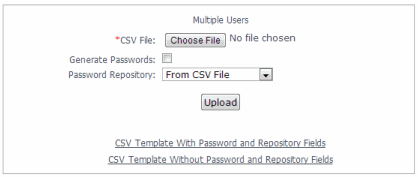
- Select the CSV
Template link to open a template CSV file where you create your list of
guest users to pre-register. You can use a CSV template that includes password
and password repository fields or not, depending on your network requirements. Do not change any of the column headings in the file.
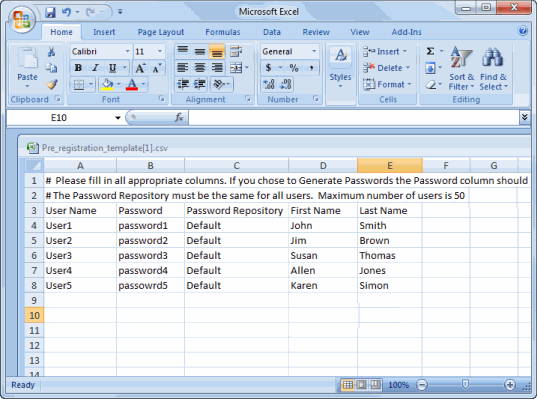
Following is an explanation of the columns that need to be filled in for each user, depending on the template you selected.- User Name — Enter the username for the guest user connecting to the network. Usernames must be unique and cannot already exist in the local password repository. Usernames are case sensitive. For example, "JSmith" and "jsmith" would be considered two different usernames. (If you do try to pre-register existing usernames along with new usernames, you are notified of the error and given the option to continue registering the new names.)
- Password — Enter the password for the guest user connecting to the network. If you want ExtremeCloud IQ Site Engine to automatically generate end user passwords, leave the password column blank and select the Generate Passwords checkbox on the Multiple Users panel.
- Password Repository — When you pre-register the user, their credentials are automatically be added to the local password repository specified here. Local Password Repositories are configured in the AAA Configuration window. If you are using the Default repository, you can use the Password Repository drop-down list (in the Multiple Users section) to select Default, and then you don't have to enter the Password Repository for each entry.
- First Name/Last Name — Enter the guest user's first and last name. The name is printed on the voucher along with their registration credentials.
NOTE: You can add additional columns to be included in the template using the Manage Custom Fields window accessed from the Customize Fields link in the Edit Portal Configuration window's Authenticated Registration view and Secure Guest Access view, however, the template always displays the First Name and Last Name fields even if they are not selected as visible/required in the Manage Custom Fields window. This is because it is important for the first and last name to be included on the pre-registration voucher you print. - When you have finished entering the guest user information, save and close the file.
- Back in the Multiple Users panel, enter the path and filename for the CSV file by using the Browse button to browse to the file on your system.
- If your CSV file includes a Password Repository, use the Password Repository drop-down list to specify whether to use the default repository or the repository specified in the file.
- Select the Upload button. Users are added to the local password repository and to the Registration Administration web page.
- Individual vouchers (see an example below) are generated that provide registration instructions and the guest user's registration credentials for each guest user. Print out these vouchers to give to the guest users.
- To register another user, you must re-access the Pre-Registration Portal by using the browser's back button or re-entering the URL.
| IMPORTANT: | Vouchers must be printed out immediately, as there is no way to go back
and print out a voucher after you leave the web page. If you do not print out the
vouchers, the vouchers have to be created by hand. In the event that the
"Generate Password" option is used, you need to modify the guest user
passwords using the registration administration page or local repository
administration. |
|---|
For information on related help topics: