FlexViews provide a convenient way for Operations people to view device data. These views are accessible from ExtremeCloud IQ Site Engine Devices and do not require the installation of any software (including ExtremeCloud IQ Site Engine) other than the browser itself.
You can also add your own custom FlexViews in ExtremeCloud IQ Site Engine.
Configure the options on the Administration > Options > FlexView tab to determine the behavior of FlexViews in ExtremeCloud IQ Site Engine.
To launch a FlexView, you must be a member of an authorization group that is assigned the OneView > FlexView > OneView FlexView Read Access capability. To launch and edit a FlexView, you must be a member of an authorization group that is assigned the OneView > FlexView > OneView FlexView Read/Write Access capability.
This Help topic provides information on the following topics:
Browser Requirements
The following web browsers are supported:
- Microsoft Edge
- Mozilla Firefox 34 and later
- Google Chrome 33.0 and later
Enable JavaScript in your browser for the views to function. To avoid impaired functionality, enable cookies for your browser. This includes (but is not limited to) the ability to persist table configurations such as filters, sorting, and column selections.
Launching FlexViews
Use the following steps to launch and open a FlexView from the Network tab.
- Launch ExtremeCloud IQ Site Engine and select Network > Devices.
- Select one or more devices in the Devices tab left panel or from within the Devices list.
NOTE: When you select multiple devices, a FlexView may take additional time to populate with data, depending on the number of rows displayed in the particular view. Because of this, we recommend that, for interface-based FlexViews, you select five devices or fewer. - Select the Menu icon (
 ) and select View >
FlexView from the menu.
) and select View >
FlexView from the menu. - Select a FlexView in one of the following ways:
- Expand the Bookmarks folder in the left panel to view the FlexViews that are bookmarked.
- Expand the Categories folder in the left panel. Select a Category from the left panel, depending on the type of FlexView you want to open.
NOTE: ExtremeCloud IQ Site Engine saves user-created Custom FlexViews in the My FlexViews Category. - Locate a FlexView in the right panel.
Select the Open drop-down list and select whether you want to open the FlexView in a new tab or window.
The Select FlexView window opens.
| NOTE: | The location and availability of FlexViews in the Select FlexView window changes depending on the configuration of the options on the Administration > Options > FlexView tab. |
|---|
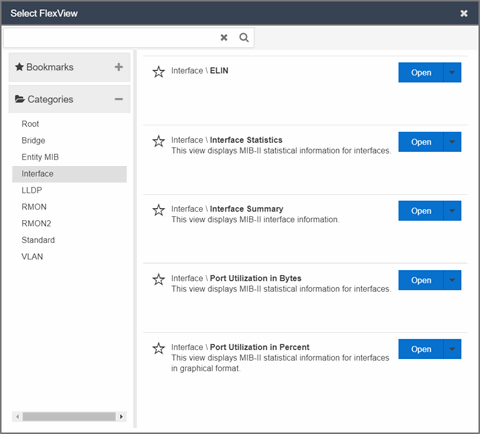
| NOTE: | Select the Star icon next to a FlexView in the right panel and select the device types for which it is applicable to save it in the Bookmarks folder in the left panel of the Select FlexViews window. This allows you to quickly find frequently used FlexViews. |
|---|
The FlexView opens in a new tab or window, depending on what you select.
Using FlexViews
FlexViews let you manipulate the table data in several ways to customize the view for your own needs:
- Select the column headings to sort column data in ascending or descending order.
- Hide or display different columns by selecting a column heading drop-down arrow and selecting the column options from the menu.
- Rearrange columns by dragging a column heading to the desired position.
- Use the Search field to filter on and search for specific FlexView data.
- Set a Refresh Interval, which automatically refreshes the data at the specified interval.
- Edit the values in FlexView table columns containing a writable MIB object.
- In the toolbar at the top of the window, select Retrieve from Devices (
 ) to clear all data and retrieve data again from selected Devices.
 - In the status bar at the bottom of the window, select Refresh from Cache (
 ) to show any new data collected since the last FlexView Update.
| NOTE: | Row creation and data exports are not currently supported in
FlexViews. |
|---|
Editing Writable Values
You can change the value in FlexView table columns that contain a writable MIB object.
- Select one or more rows in the FlexView that contain columns with writable MIB objects, right-click and select Edit Selected Rows.
- Select the writable objects you are changing and enter the appropriate values as needed.
- Select OK to enter your changes into the selected rows. The new values are written directly to the device.
The Edit Selected Rows window opens.

| NOTE: | Adding an alias to a port configures both ExtremeCloud IQ Site Engine and the CLI of the switch to display the character string. |
Bookmarking FlexViews
You can save frequently used FlexViews for each device type in the Bookmarks folder of the Select FlexView window. Bookmarks are shared among all ExtremeCloud IQ Site Engine users and provide your organization with the ability to select a FlexView without searching.
To add a FlexView to the Bookmarks folder, select the Category from the left panel and select the Star icon next to the appropriate FlexView in the right panel. Select the device types for which the FlexView is applicable and select Save. The FlexView is accessible from the Bookmarks folder when you access the Select FlexView window for a device that matches the device type configured for the FlexView.
Exporting Table Data
There are two methods of exporting the data in the table:
- Export to CSV
- Select to export all of the data in the table to a .CSV file. The exported data displays with any sorting, filtering, and searching applied.
- Export Selected to CSV
- Select to export the data in the currently selected row in the table to a .CSV file.
Add Custom FlexViews and MIBs
Use the instructions in this topic to add custom FlexViews and MIBs in ExtremeCloud IQ Site Engine.
To add a new FlexView to ExtremeCloud IQ Site Engine:
- Create the following directory on the ExtremeCloud IQ Site Engine server:
/usr/local/Extreme_Networks/NetSight/appdata/VendorProfiles/Stage/MyVendorProfile/FlexViews/My FlexViewsif it does not already exist. - Add your custom FlexView files (.TPL) to the
/usr/local/Extreme_Networks/NetSight/appdata/VendorProfiles/Stage/MyVendorProfile/FlexViews/My FlexViewsdirectory on the ExtremeCloud IQ Site Engine server. - Add the MIB files that correspond to your custom FlexView files to the
/usr/local/Extreme_Networks/NetSight/appdata/VendorProfiles/Stage/MyVendorProfile/MIBsdirectory on the ExtremeCloud IQ Site Engine server. - Log into the system shell (via the local console or SSH) on the ExtremeCloud IQ Site Engine server as root.
- Restart the ExtremeCloud IQ Site Engine server:
- Enter
service nsserver stop. - Enter
service nsserver start.
- Enter