This section outlines how to create and edit a VLAN. From the Network tab, you can:
- Create a new VLAN
- Edit the ports of an existing VLAN
- Edit the name of an existing VLAN
- Remove devices from an existing VLAN
To create a new VLAN:
- Launch ExtremeCloud IQ Site Engine.
- Open the Network > Devices tab.
- Select the device from the devices list. Right-click the device and select Device > Configure Device.
The Configure Device window opens.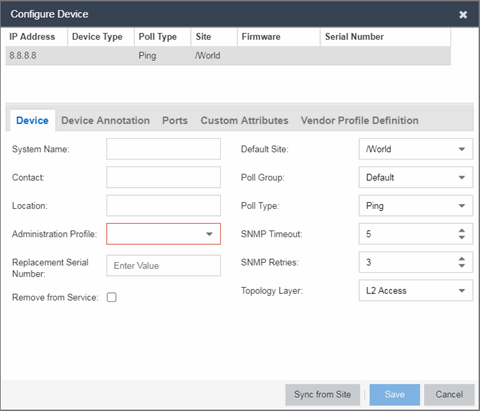
- Select the VLAN Definition tab.
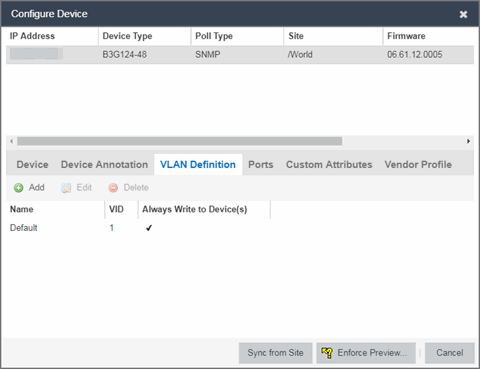
- Select the Add button.
- Enter the Name and the VID for the new VLAN.
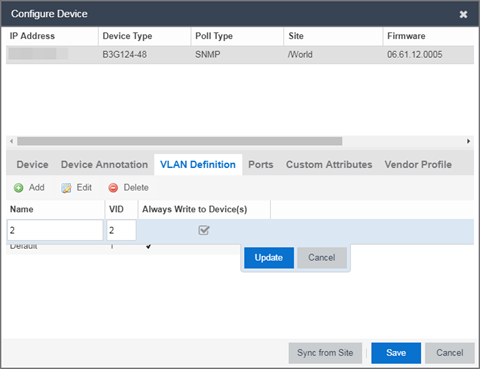
- Select Update.
The new VLAN is added to the list. - Select Enforce Preview.
- Under the Enforce Options, select the VLAN Definition checkbox and select Enforce.
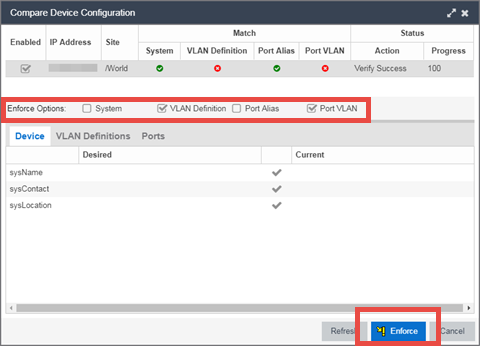
site.enforceOption.autoEnable.system=falsesite.enforceOption.autoEnable.vlanDefinition=falsesite.enforceOption.autoEnable.portAlias=falsesite.enforceOption.autoEnable.portVlan=false
| NOTE: |
By default, the checkboxes in the Enforce Options section of the window are not selected. To configure ExtremeCloud IQ Site Engine to select the checkboxes by default, open the |
The VLAN is now created and assigned to the device.
To configure the VLAN(s) on the ports
- Launch ExtremeCloud IQ Site Engine.
- Open the Network > Devices tab.
- Select the device from the devices list.
- Right-click the device and select Device > Configure Device.
The Configure Device window opens. - Select the Ports tab.
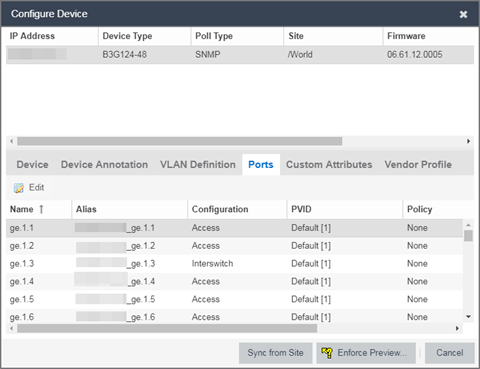
- Select the Port on which you are configuring the VLAN.
- Select Edit.
The Port is now configurable. - Change the PVID, Tagged, and Untagged options to configure the VLAN onto the port.
- Select Enforce Preview.
- Under the Enforce Options, select the Port VLAN checkbox and select Enforce.
site.enforceOption.autoEnable.system=falsesite.enforceOption.autoEnable.vlanDefinition=falsesite.enforceOption.autoEnable.portAlias=falsesite.enforceOption.autoEnable.portVlan=false
| NOTE: |
By default, the checkboxes in the Enforce Options section of the window are not selected. To configure ExtremeCloud IQ Site Engine to select the checkboxes by default, open the |
The VLAN is now configured to the Ports.
To edit the name of a VLAN:
- Launch ExtremeCloud IQ Site Engine.
- Open the Network > Devices tab.
- Select the device from the devices list.
- Right-click the device and select Device > Configure Device.
The Configure Device window opens. - Select the VLAN Definition tab.
- Select the VLAN to edit and then select the Edit button.
- Enter the new name for the VLAN.
- Select Update.
The Edit pane closes. - Select Save to exit the VLAN Definition window. The VLAN is updated.
To remove devices from a VLAN:
- Launch ExtremeCloud IQ Site Engine.
- Open the Network > Devices tab.
- Select the device from the devices list. Right-click the device and select Device > Configure Device.
The Configure Device window opens. - Select the VLAN Definition tab.
The VLAN Definition pane opens. - Select the VLAN and select Delete.